Tampilkan postingan dengan label Form. Tampilkan semua postingan
If you are working with Restful API’s and you must need to send a JSON input response via web project, especially for Node projects. This post helps you to create a JSON input string using JavaScript. It's very useful, converting Data objects to JSON data format implemented with $.toJSON Jquery plugin.

Rating: 4.5
Reviewer: Unknown
ItemReviewed: JSON Input String using JavaScript.

Berikut program sederhana menggunakan Ajax dan PHP untuk membuat Form "Hubungi Kami"
Pertama-tama disiapkan script HTML yang berisi Form isian dan content :
<body>
<div class="wideBox">
<h1>Membuat form "Hubungi Kami" dengan Ajax dan PHP</h1>
<h2>Klik Link "Hubungi Kami"...</h2>
</div>
<div id="content">
<p style="padding-top: 50px; font-weight: bold; text-align: center;"><a href="#contactForm">~ Hubungi Kami ~</a></p>
</div>
<form id="contactForm" action="processForm.php" method="post">
<h2>Silahkan mengirimkan pesan kepada kami...</h2>
<ul>
<li>
<label for="senderName">Nama Lengkap</label>
<input type="text" name="senderName" id="senderName" placeholder="Silahkan isi nama lengkap anda" required="required" maxlength="40" />
</li>
<li>
<label for="senderEmail">Alamat Email</label>
<input type="email" name="senderEmail" id="senderEmail" placeholder="Silahkan isi alamat email anda" required="required" maxlength="50" />
</li>
<li>
<label for="message" style="padding-top: .5em;">Isi Pesan</label>
<textarea name="message" id="message" placeholder="Silahkan isi pesan anda" required="required" cols="80" rows="10" maxlength="10000"></textarea>
</li>
</ul>
<div id="formButtons">
<input type="submit" id="sendMessage" name="sendMessage" value="Kirim" />
<input type="button" id="cancel" name="cancel" value="Batal" />
</div>
</form>
<div id="sendingMessage" class="statusMessage"><p>Mengirim pesan anda, silahkan...</p></div>
<div id="successMessage" class="statusMessage"><p>Terimakasih telah mengirim pesan! Kami akan segera merespon pesan anda.</p></div>
<div id="failureMessage" class="statusMessage"><p>Pengiriman pesan gagal. Silahkan coba lagi.</p></div>
<div id="incompleteMessage" class="statusMessage"><p>Silahkan cek ulang isian anda.</p></div>
<div class="wideBox">
<p>© antefer.blogspot.com</p>
</div>
</body>
dari potongan script di atas, form akan mengirimkan data ke halaman processForm.php. Untuk processForm.php berisi program php mailer untuk mengirim email menggunakan fungsi PHP
<?phpUntuk menangani Form isian digunakan program sebagai berikut :
// Menentukan variabel constan untuk penerima email
define( "RECIPIENT_NAME", "Penerima" );
define( "RECIPIENT_EMAIL", "email@penerima.com" );
define( "EMAIL_SUBJECT", "Pesan pengunjung" );
// Ambil isi dari Form isian
$success = false;
$senderName = isset( $_POST['senderName'] ) ? preg_replace( "/[^.-' a-zA-Z0-9]/", "", $_POST['senderName'] ) : "";
$senderEmail = isset( $_POST['senderEmail'] ) ? preg_replace( "/[^.-_@a-zA-Z0-9]/", "", $_POST['senderEmail'] ) : "";
$message = isset( $_POST['message'] ) ? preg_replace( "/(From:|To:|BCC:|CC:|Subject:|Content-Type:)/", "", $_POST['message'] ) : "";
// Jika semua isian terisi
if ( $senderName && $senderEmail && $message ) {
$recipient = RECIPIENT_NAME . " <" . RECIPIENT_EMAIL . ">";
$headers = "From: " . $senderName . " <" . $senderEmail . ">";
$success = mail( $recipient, EMAIL_SUBJECT, $message, $headers );
}
// Mengembalikan respon ke browser
if ( isset($_GET["ajax"]) ) {
echo $success ? "success" : "error";
} else {
?>
<html>
<head>
<title>Terima kasih!</title>
</head>
<body>
<?php if ( $success ) echo "<p>Terimakasih telah mengirim pesan! Kami akan segera merespon pesan anda.</p>" ?>
<?php if ( !$success ) echo "<p>Pengiriman pesan gagal. Silahkan coba lagi.</p>" ?>
<p>Klik pada tombol back di bowser anda untuk kembali ke halaman utama.</p>
</body>
</html>
<?php
}
?>
var messageDelay = 2000; // Belerapa lama untuk memunculkan notifikasi (milliseconds)Untuk menangani proses pengiriman isian, validasi, dan notofikasi digunakan Ajax sebagai berikut :
// Inisialisasi form ketika halaman telah siap
$( init );
// Inisialisasi Form
function init() {
// Sembunyikan Form
// Membuat fungsi submitForm()
// Posisikan form ditengah-tengah halaman.
$('#contactForm').hide().submit( submitForm ).addClass( 'positioned' );
// Ketika link "Hubungi Kami" di klik maka:
// 1. membuat efek fade pada form isian
// 2. munculkan form isian
// 3. Fokuskan pada field pertama
$('a[href="#contactForm"]').click( function() {
$('#content').fadeTo( 'slow', .2 );
$('#contactForm').fadeIn( 'slow', function() {
$('#senderName').focus();
} )
return false;
} );
// Ketika tombol "batal" di klik, tutup form isian
$('#cancel').click( function() {
$('#contactForm').fadeOut();
$('#content').fadeTo( 'slow', 1 );
} );
// Ketika tombol "Esc" keyboard ditekan, tutup form isian
$('#contactForm').keydown( function( event ) {
if ( event.which == 27 ) {
$('#contactForm').fadeOut();
$('#content').fadeTo( 'slow', 1 );
}
} );
}
// Submit Form dengan ajaxTerakhir membuat stylesheep untuk desain tampilan form dan notifikasi sebagai berikut :
function submitForm() {
var contactForm = $(this);
// Apakah semua field dalam isian terisi semua?
if ( !$('#senderName').val() || !$('#senderEmail').val() || !$('#message').val() ) {
// Jika tidak; munculkan notifikasi
$('#incompleteMessage').fadeIn().delay(messageDelay).fadeOut();
contactForm.fadeOut().delay(messageDelay).fadeIn();
} else {
// Jika ya; Submit isian form ke PHP dengan Ajax
$('#sendingMessage').fadeIn();
contactForm.fadeOut();
$.ajax( {
url: contactForm.attr( 'action' ) + "?ajax=true",
type: contactForm.attr( 'method' ),
data: contactForm.serialize(),
success: submitFinished
} );
}
return false;
}
// menangani respon dari Ajax
function submitFinished( response ) {
response = $.trim( response );
$('#sendingMessage').fadeOut();
if ( response == "success" ) {
// Jika isian terkirim sempurna:
// 1. munculkan notifikasi
// 2. Hapus isian Form
// 3. tutup isian form
$('#successMessage').fadeIn().delay(messageDelay).fadeOut();
$('#senderName').val( "" );
$('#senderEmail').val( "" );
$('#message').val( "" );
$('#content').delay(messageDelay+500).fadeTo( 'slow', 1 );
} else {
// Jika isian gagal terkirim: Munculkan notifikasi,
// tampilkan form isian kembali
$('#failureMessage').fadeIn().delay(messageDelay).fadeOut();
$('#contactForm').delay(messageDelay+500).fadeIn();
}
}
<style type="text/css">


/* Style untuk body */

body {
  margin: 30px;
  font-family: "Georgia", serif;
  line-height: 1.8em;
  color: #333;
}


/* Menentukan dimensi dari div content */

#content {
  width: 800px;
  padding: 50px;
  margin: 0 auto;
  display: block;
  font-size: 1.2em;
}

#content h2 {
  line-height: 1.5em;
}


/* Menentukan tampilan rounded border pada beberapa elemen */

#contactForm, .statusMessage, input[type="submit"], input[type="button"] {
  -moz-border-radius: 10px;
  -webkit-border-radius: 10px;
  border-radius: 10px;
}


/* Style for the contact form and status messages */

#contactForm, .statusMessage {
  color: #666;
  background-color: #ebedf2;
  background: -webkit-gradient( linear, left bottom, left top, color-stop(0,#dfe1e5), color-stop(1, #ebedf2) );
  background: -moz-linear-gradient( center bottom, #dfe1e5 0%, #ebedf2 100% );
  border: 1px solid #aaa;
  -moz-box-shadow: 0 0 1em rgba(0, 0, 0, .5);
  -webkit-box-shadow: 0 0 1em rgba(0, 0, 0, .5);
  box-shadow: 0 0 1em rgba(0, 0, 0, .5);
  opacity: .95;
}


/* Ukurann dari form isian */

#contactForm {
  width: 40em;
  height: 33em;
  padding: 0 1.5em 1.5em 1.5em;
  margin: 0 auto;
}


/* Menentukan posisi dari form isian di halaman (center) */

#contactForm.positioned {
  position: fixed;
  top: 0;
  bottom: 0;
  left: 0;
  right: 0;
  margin-top: auto;
  margin-bottom: auto;
}


/* Menentukan posisi dari pesan notifikasi */

.statusMessage {
  display: none;
  margin: auto;
  width: 30em;
  height: 2em;
  padding: 1.5em;
  position: fixed;
  top: 0;
  bottom: 0;
  left: 0;
  right: 0;
}

.statusMessage p {
  text-align: center;
  margin: 0;
  padding: 0;
}


/* Menentukan header dari form isian */

#contactForm h2 {
  font-size: 2em;
  font-style: italic;
  letter-spacing: .05em;
  margin: 0 0 1em -.75em;
  padding: 1em;
  width: 19.5em;
  color: #aeb6aa;
  background: #dfe0e5;
  border-bottom: 1px solid #aaa;
  -moz-border-radius: 10px 10px 0 0;
  -webkit-border-radius: 10px 10px 0 0;
  border-radius: 10px 10px 0 0;
}


/* menetukan margin dari form isian */

#contactForm ul {
  list-style: none;
  margin: 0;
  padding: 0;
}

#contactForm ul li {
  margin: .9em 0 0 0;
  padding: 0;
}

#contactForm input, #contactForm label {
  line-height: 1em;
}


/* Menetukan style untuk label */

label {
  display: block;
  float: left;
  clear: left;
  text-align: right;
  width: 28%;
  padding: .4em 0 0 0;
  margin: .15em .5em 0 0;
  font-weight: bold;
}


/* Menentukan style dari input fields */

input, textarea {
  display: block;
  margin: 0;
  padding: .4em;
  width: 67%;
  font-family: "Georgia", serif;
  font-size: 1em;
  border: 1px solid #aaa;
  -moz-border-radius: 5px;
  -webkit-border-radius: 5px;
  border-radius: 5px;
  -moz-box-shadow: rgba(0,0,0,.2) 0 1px 4px inset;
  -webkit-box-shadow: rgba(0,0,0,.2) 0 1px 4px inset;
  box-shadow: rgba(0,0,0,.2) 0 1px 4px inset;
  background: #fff;
}

textarea {
  height: 13em;
  line-height: 1.5em;
  resize: none;
}


/* Menetukan style border round dan shadow dari form */

#contactForm *:focus {
  border: 1px solid #66f;
  outline: none;
  box-shadow: none;
  -moz-box-shadow: none;
  -webkit-box-shadow: none;
}


/* Menetukan input fields jika pengisian benar */

input:valid, textarea:valid {
  background: #dfd;
}


/* Menentukan style untuk Tombol batal dan Kirim */

input[type="submit"], input[type="button"] {
  float: right;
  margin: 2em 1em 0 1em;
  width: 10em;
  padding: .5em;
  border: 1px solid #666;
  -moz-border-radius: 10px;
  -webkit-border-radius: 10px;
  border-radius: 10px;
  -moz-box-shadow: 0 0 .5em rgba(0, 0, 0, .8);
  -webkit-box-shadow: 0 0 .5em rgba(0, 0, 0, .8);
  box-shadow: 0 0 .5em rgba(0, 0, 0, .8);
  color: #fff;
  background: #0a0;
  font-size: 1em;
  line-height: 1em;
  font-weight: bold;
  opacity: .7;
  -webkit-appearance: none;
  -moz-transition: opacity .5s;
  -webkit-transition: opacity .5s;
  -o-transition: opacity .5s;
  transition: opacity .5s;
}

input[type="submit"]:hover,
input[type="submit"]:active,
input[type="button"]:hover,
input[type="button"]:active {
  cursor: pointer;
  opacity: 1;
}

input[type="submit"]:active, input[type="button"]:active {
  color: #333;
  background: #eee;
  -moz-box-shadow: 0 0 .5em rgba(0, 0, 0, .8) inset;
  -webkit-box-shadow: 0 0 .5em rgba(0, 0, 0, .8) inset;
  box-shadow: 0 0 .5em rgba(0, 0, 0, .8) inset;
}

input[type="button"] {
  background: #f33;
}


/* menetukan style header dan footer dari kotak form */

.wideBox {
  clear: both;
  text-align: center;
  margin: 70px;
  padding: 10px;
  background: #ebedf2;
  border: 1px solid #333;
}

.wideBox h1 {
  font-weight: bold;
  margin: 20px;
  color: #666;
  font-size: 1.5em;
}

</style>

<!-- Style untuk IE7 -->

<!--[if lt IE 8]>
<style>

/* Menetukan posisi dari fields isian di IE7 */

input, textarea {
  float: right;
}

#formButtons {
  clear: both;
}


#contactForm.positioned, .statusMessage {
  left: 50%;
  top: 50%;
}

#contactForm.positioned {
  margin-left: -20em;
  margin-top: -16.5em;
}

.statusMessage {
  margin-left: -15em;
  margin-top: -1em;
}

</style>
<![endif]-->
Agar Ajax dapat berjalan gunakan jQuery library yang dapat mengambil link langsung dan tempatkan pada <head> :
<script type="text/javascript" src="http://ajax.googleapis.com/ajax/libs/jquery/1.5.1/jquery.min.js"></script>
Demikian sedikit contoh tentang pembuatan Form Contact Us dengan Ajax dan PHP. Dapat dilakukan modifikasi misalnya, menggunakan captcha untuk mencegah spam. Untuk demo dapat dilihat disini. Untuk download source code-nya dapat didownload disini.
Rating: 4.5
Reviewer: Unknown
ItemReviewed: Membuat Form "Contact Us" dengan Ajax dan PHP
If you are working with mobile web applications, then you must adapt new HTML5 components. This post explains you how to implement new HTML5 input types while creating forms in mobile web projects. Take a look at these screen shots of the new input types in browsers that support in iPhone. and iPad.

Rating: 4.5
Reviewer: Unknown
ItemReviewed: HTML5 Input Types for Mobile.
Are you looking for Amazon S3 bucket file upload from your web project using PHP technology., if yes take a quick look at this post demo. Amazon S3 is the best option to reduce the bandwidth cost as well file load time. Upload functionality is the most sensitive part in web project, one small mistake hackers will upload miscellaneous files. If you are connect with Amazon S3 you will be safe side.

Rating: 4.5
Reviewer: Unknown
ItemReviewed: Upload Files to Amazon S3 using PHP
This post helps you to create a ZIP file using PHP, Arun had coded a few lines of script that system converts the selected files into ZIP file format. It is useful for ecommerce web projects like selling PDFs, Images and Docs ect, use can choose files and download it into compressed format. Take a look at this live demo

Rating: 4.5
Reviewer: Unknown
ItemReviewed: Creating ZIP File with PHP.
This post is a continuation of my previous post Bootstrap tutorial for blog design and already explained about fluid page design. Today let's look at the form HTML elements that comes with Twitter Bootstrap toolkit using these I made a rich registration/sign up form with validation in 10 mins . Bootstrap helps you to produce clean and highly usable applications, it will reduce larger engineering efforts and gives uniform application solutions.

Rating: 4.5
Reviewer: Unknown
ItemReviewed: Bootstrap Registration Form Tutorial.
We received many tutorial requests from 9lessons readers that asked how to create file upload progress bar with PHP and Jquery. In this post Arun Kumar Sekar had developed few lines of code using PHP APC library, it is very simple getting the server file upload process every few second and increasing the bar color using jquery css property. Just take a look at this demo.

Rating: 4.5
Reviewer: Unknown
ItemReviewed: File Upload Progress Bar with Jquery and PHP.
When you create your own website, sooner or later you might need to incorporate contact forms in them. Forms are very important as a means for you to collect data or information from your visitors. Whether you would want to have a contact or feedback form, a support form, a customer survey form, an online product order form, an event registration form, an employment application form, a reservation form, a send testimonial form, or any types of form, AJAX Form Pro could really help you with that.

Rating: 4.5
Reviewer: Unknown
ItemReviewed: AJAX Form Pro v2: Create Unlimited Secure Web Forms for Yourself and Your Customers
We received many tutorial requests from 9lessons readers that asked how to generate watermark image using PHP. In this post Arun Kumar Sekar coded two functions such as watermark_text() and watermark_image() to generate text and images watermarks on images. Integrate this to your web project upload image system and produce copyright photos.

Rating: 4.5
Reviewer: Unknown
ItemReviewed: PHP Image and Text Watermark
This post helps you to submit your form without refreshing page. In this tutorial I will show you how simple it is to do using jQuery form plugin just five lines of JavaScript code, no need to post data string values via ajax. Explained collaboration with validate plugin for implementing form field validations.

Rating: 4.5
Reviewer: Unknown
ItemReviewed: Submit Form without Refreshing Page with Jquery
This post is about basic template engine management using Smarty with PHP. Smarty engine is an awesome tool, it saves your design development time. My friend Anil Panigrahi made a simple tutorial that how to implement Smarty for you PHP applications to follow basic standards and steps.

Read more »
Rating: 4.5
Reviewer: Unknown
ItemReviewed: Smarty Template Engine using PHP
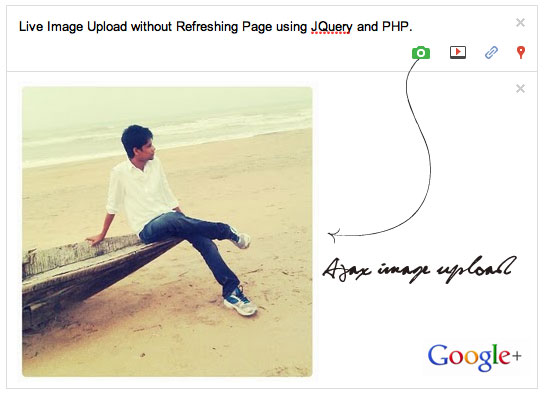
Are you looking for ajax file/image upload and preview without refreshing page using Jquery. I had implemented this ajax form submitting using jquery.form plugin and used Arun Shekar's image cropping PHP code for uploading images. Just five lines of JavaScript code, Using this you can upload files, image and videos.
Read more »
Rating: 4.5
Reviewer: Unknown
ItemReviewed: Ajax Image Upload without Refreshing Page using Jquery.
Few days back I had posted an article about Facebook Graph API connection and explained how to request facebook access token and reading home timeline feed. This post is sequel how to update Facebook wall status from third party site with existing access token in "users" table. Try demo at labs.9lessons.info

Rating: 4.5
Reviewer: Unknown
ItemReviewed: Facebook Graph API to Post Status Update
I had received a comment on my previous post Payment system with Paypal about injecting wrong product price values via third party site using FORM, this is a valid point. So that I had updated my previous post code “success.php” re-confirming the product price details before payment success message and added new field class ‘currecy type’ on “products” table.

Rating: 4.5
Reviewer: Unknown
ItemReviewed: Update Payment System with Paypal
Using facebook registration plug-in users can easily sign up on your website using facebook data. With one simple facebook login the form will be filled with user appropriate data. This plug-in is a simple iframe you can place it anywhere on your webpage. You can also add a custom field if facebook doesn’t have.

Rating: 4.5
Reviewer: Unknown
ItemReviewed: User Signup using Facebook Data
I had designed a magical feedback form using Jquery with easing animation effect. It's simple and intersting just hiding and showing the div tags with jquery. Use it and make some thing better your web project feedback box.
Rating: 4.5
Reviewer: Unknown
ItemReviewed: Magical feedback form with Jquery
Are you looking for Google style CAPTCHA (Human verification code) script for PHP projects, Please take a look at this post. I want to explain how to implement cool-php-captcha script for forms. Use it and add security to your web projects.

Rating: 4.5
Reviewer: Unknown
ItemReviewed: Google Like CAPTCHA with PHP.
How to submit jquery duplicate/clone field values to form with PHP. It's very basic level code, I had implemented this using relCopy.js jquery plugin to duplicating the existing field. I hope it's useful for you. Thanks!

Rating: 4.5
Reviewer: Unknown
ItemReviewed: Jquery Duplicate Fields Form Submit with PHP.
In this post I want to explain how to insert encrypted password while registration and accessing the same with login time. I had implement this at labs.9lessons.info login page. I'm just storing encrypted user password in database. Demo username ='test' and password = 'test'

Rating: 4.5
Reviewer: Unknown
ItemReviewed: PHP Login Script with Encryption.
This time I want to explain about "Form validation using regular expressions with jquery". I had developed a tutorial using jquery.validate plugin, It's very simple. Implement this and enrich your web projects. Take a look at live demo

Rating: 4.5
Reviewer: Unknown
ItemReviewed: Jquery Validation with Regular Expressions.


